> For the complete documentation index, see [llms.txt](https://docs.tygapay.com/llms.txt). Markdown versions of documentation pages are available by appending `.md` to page URLs; this page is available as [Markdown](https://docs.tygapay.com/plugins/woocommerce/integration.md).
# Integration
{% hint style="warning" %}
Before you continue make sure that you have your TygaPay Api credentials.
{% endhint %}
### 1. Install the TygaPay plugin for WooCommerce
* Download the latest plugin zip file below:
:paperclip: [Plugin v1.0.5](https://firebasestorage.googleapis.com/v0/b/tygapay-ba6b4.appspot.com/o/woocommerce_plugin%2FPayMe%2Ftygapay-woocommerce-payme-v1.0.5.zip?alt=media\&token=cfc044b7-48cf-4b25-94e3-55dbe4ae1b9d)
* Within your Wordpress admin section navigate to "**Plugins**".
* Click "**Add new**".
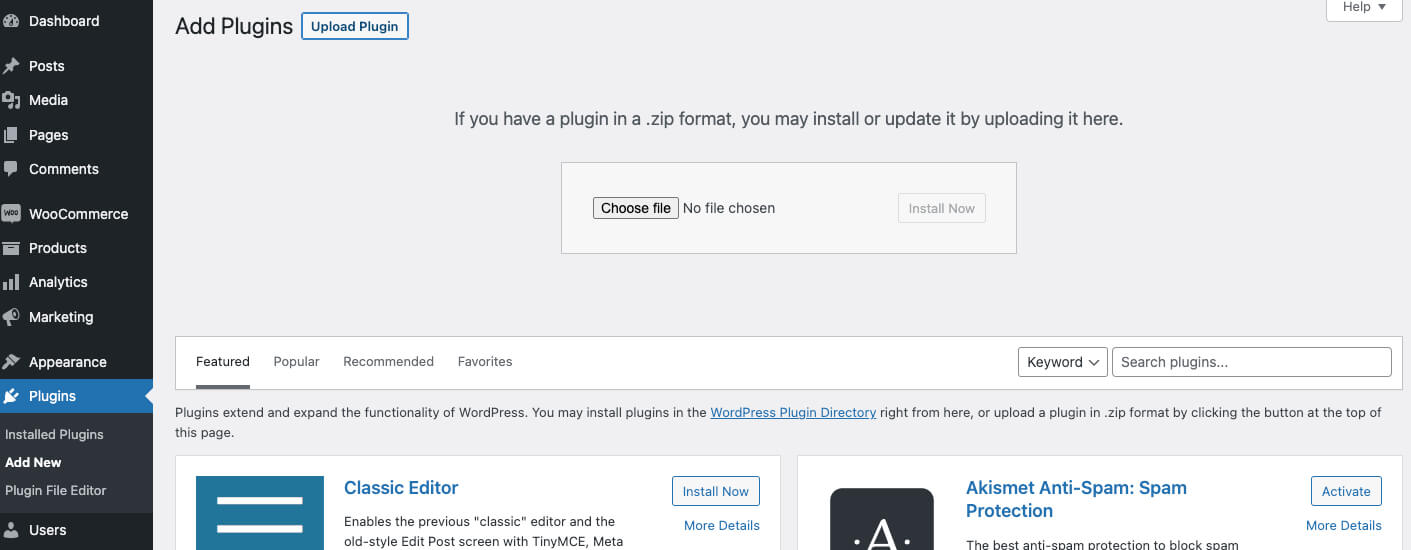
* Then click "**Upload Plugin**".
* Now click "**Choose file**" and upload the plugin zip file you downloaded.
* Make sure you click "**Activate**" after the installation has been completed.
Upload the plugin
### 2. Confirm that the TygaPay plugin has been enabled
* Within your Wordpress admin section navigate to "**WooCommerce**".
* Click "**Settings**".
* Then click the "**Payments**" tab at the top.
* Ensure that the payment method for **TygaPay Gateway** is enabled.
Enable the plugin
### 3. Lastly enter your TygaPay Api credentials
* Following on from step 2 click "**Manage**" next to TygaPay Gateway.
* Enter the "**Live Api Key**" provided by the TygaPay team.
* And the "**Live Secret**" provided by the TygaPay team.
* Click "**Save changes**" and you are ready to go.
Enter your credentials
### 4. Success
On the checkout page users will now have the option to pay using the TygaPay payment option.
Check out the plugin in action below:
{% content-ref url="/spaces/pCZIBuMMKukshUmEKQzb/pages/I2NESDwew43vEW6VREtD" %}
[How It Works](/plugins/woocommerce/how-it-works.md)
{% endcontent-ref %}
---
# Agent Instructions
This documentation is published with GitBook. GitBook is the documentation platform designed so that both humans and AI agents can read, navigate, and reason over technical content effectively. Learn more at gitbook.com.
## Querying This Documentation
If you need additional information that is not directly available in this page, you can query the documentation dynamically by asking a question.
Perform an HTTP GET request on the current page URL with the `ask` query parameter:
```
GET https://docs.tygapay.com/plugins/woocommerce/integration.md?ask=
```
The question should be specific, self-contained, and written in natural language.
The response will contain a direct answer to the question and relevant excerpts and sources from the documentation.
Use this mechanism when the answer is not explicitly present in the current page, you need clarification or additional context, or you want to retrieve related documentation sections.